blog

Yorkshire Dales by Pete Rowbottom

A visit to some places that I hadn’t been to in a long time, namely Malham and also the Craven Lime Kiln near Stainforth. The Weather was forecast to be a bit of everthing and it certainly was that! Some amazing light shows amid black stormy skies were a real bonus as was a very brief rainbow that I only just caught, the craggy outcrops also had some great light during the day. Camera Equipment used: Fuji X100 VI, DJI Air 2S.

Craven Lime Kiln

Gordale Scar upper level

Gordale Scar - the waterfall is just a trickle compared to normal

Gordale Scar from above

Crags above Gordale, first part of the storm rolling in

Malham, stunning light in the midst of the black sky

Malham Rainbow

Malham contrasts

Rainstorm hitting the land, Pendle Hill to the rear

Crag at Langcliffe

November 2023 - Dinorwic Quarry Revisit by Pete Rowbottom

Another visit to Dinorwic, this time taking in a few new locations, to be honest I thought I’d done pretty much all of it but the places continues to throw up surprises in directions that you have somehow missed before. An old truck maintenance facilty was found along with a few tunnels and a selection of rutsing away old trucks plus changes to the quarry the weather and rockfalls bring, The idea behind these visits is to put my own style and stamp on the images from this fascinating place. The customary very changeable weather was again in place and allowed for some rather dramatic images. All available as prints and to license, please use the ‘Let’s Talk’ option at the top.

Winding reel

Hoisting Chains

Now cut off old slate building

‘The Caban’ in a brief moment of light.

Dali’s Hole - Autumnal Falls

Collapse

Winding House in storm light.

Rail Incline

Illuminated Slate

Truck repair Shop

Truck Repair Pit

Lost Industry

Cable & Slate

End of the line

Abandoned Slate Trucks

Rusty Rails

Fallen Giant

Winding Light

Cave Dwelling - A rather wet revisit to Dinorwic by Pete Rowbottom

With the advent of Covid 19, travel has very much been restricted, and with it the photography options that come with travelling for imagery. Unusually for me to date (September 2020) I still haven’t been to the Lake District this year, although I’m looking to get up there really soon.

On the spare of the moment I decided to have a few days up in Snowdonia to revisit Dinorwic Quarry, and also to scout out some new locations, one great thing about Dinorwic is that it really does suit cloudy and wet weather, so if the dreaded rain should roll in you can still achieve some great images up there, well, at least sometimes you can, I got a lot more than I bargained for on the first day….

I had a couple of things I wanted to achieve on this visit, to a couple of caves that I had never visited before in the quarry, and also to get some shots with the drone I now own, now I am reasonably proficient with using it.. After checking the weather (which looked cloudy but dry) with big camera bag in tow, plus tripod, and the drone in it’s box, I set off towards the quarry once more. The caves are located to the rear of a gorgeous (and oddly coloured) pool called Dali’s Hole, upon arriving the pool was at a very high level on this visit due to the amount of rainfall that has occurred lately and the colour of it was incredible, a stark contrast to the dull hues of the slate quarry all around, only broken up by patches of colourful heather on the sides. I decided to set up for the first shot of the day, no sooner had I got set up it started to rain, not a lot at first, but enough to make it pointless shooting, so I figured I’d go to the caves and just wait for it to blow over….

Dali’s Hole

Dali’s Hole

I love exploring new places, and this location certainly has a ‘forgotten lost world’ feeling to it, here’s a few shots from inside the caves, the rain made for a great waterfall halfway in:

Home, for a few hours….

Home, for a few hours….

Slate cave and old pipe fitting

Slate cave and old pipe fitting

Inbetween Caves, and the waterfall

Inbetween Caves, and the waterfall

The Quarrymen of old

The Quarrymen of old

When I came to leave it was clear that I wasn’t going to be able to go out as the route was precarious in places and the rain was now coming down sideways, coupled with a very strong wind and the fact I’d only have one hand free to grip onto rocks I decided to wait it out in the cave for a couple of hours as the forecast was saying it would clear then. I set about getting more detailed shots and lighting the inside of the cave with a panel light I carry. A few hours passed, if anything it had just got worse, I checked the weather again and it had now changed to being the same all day! not wanting to spend a full day in a cave I just headed out into it and got completely soaked, taking my time I eventually got back to the car absolutely soaking wet.

Photography wise, the rest of the day was a write off, so an afternoon was spent ‘planning’ with a few Pints and a (really superb) Curry later on. - if you like Indian food then try Spice of Llanberis if you are in town! I’ve been 3 times now and has been great every time - https://spiceofllanberis.com/

The following morning, there was an exceptional sunrise over Lyn Padarn, and I got to explore more of the quarry that I hadn’t visited before, including using the drone, I think I’ve probably done about 90% of it now, but no doubt there are many features that I will still find on upcoming visits.

A selection of images from the trip:

‘The Caban’ and other quarry buildings

‘The Caban’ and other quarry buildings

Levels

Levels

Dinorwic wild goat

Dinorwic wild goat

Heather & Rust

Heather & Rust

A splash of nature

A splash of nature

Sunrise over Lyn Padarn and Dinorwic

Sunrise over Lyn Padarn and Dinorwic

I’m going to try and get a map of the place together, this might take a while so bear with me, it really is an enourmous place, but with care can be visited without a map, exploring it is all part of the fun, very much a sense of discovery in many ways.

Printing your work - Saal Digital Photobooks by Pete Rowbottom

While I was up in Scotland a few weeks ago, a Company called Saal Digital - https://www.saal-digital.co.uk/ granted me a £100 credit to compile a Photobook, I had never used these guys before and it had been ages since I had compiled a photobook, literally years, so I decided to give them a go as their products looked very good.

Outer Cover

Outer Cover

Saal market themselves as a ‘high end quality’ producer of Photobooks, so with this is mind I set about the task of picking the images I wanted to see in a book from my Portfolio.

For anyone who’s ever done this who has a sizeable boody of work, you will know this isn’t an easy task, but it is fun looking back through your catalogue of shots, selecting a load of images, and then gradually whittling them down to the ones you are going to use.

I started off with a 30 page book (you can add or subtract pages easily as you go along), needless to say that 30 just was not going to cut it as I had built up that much material I wasn’t prepared to leave certain images out of the selection, so I ended up with double what I started out with - 60 pages…

I have to say I was really impressed with their website as there were to hand tutorials for the creation of the book everywhere, they do make the process really easy for you, which is what you want when you are doing this, no coming up against brick walls so to speak. You download their software onto your PC and create the book within that, saving as you go along, until you are finished and upload to the checkout basket, simples.

Really well bound, and quality leather outer

Really well bound, and quality leather outer

Once I had my photo’s selected I do what I always do before printing and made sure all the images were converted to SRGB colour space, then I brightened each one slighty (1.2 gamma correction setting in Photoshop - image - adjustments- exposure) to compensate for the backlit monitor I was viewing the images on.

I opted for High End Matte Paper and a Black Leather cover… uploaded, paid, and that was that.

A few days later the book arrived and I have to say I’m absolutely over the moon with it! The quality of the book as soon as you take it out of the wrapper is evident, nice to touch, the paper inside is more like a thick card that the pictures really look good on, the colour rendition is great, and the printing is superb, basically the images look EXACTLY how I want them to look. I’d have absolutely no problem presenting this to a gallery or client to display my work.

Setting B/W off with a black background looks great on this paper

Setting B/W off with a black background looks great on this paper

East to resize images to fit your page - (the colours are a lot better in the flesh)

East to resize images to fit your page - (the colours are a lot better in the flesh)


Slight shadow under the image make it really stand out on the page

Slight shadow under the image make it really stand out on the page

These books really are good quality, and look amazing, there are much cheaper options out there, but as that saying goes - you get what you pay for, and here that is certainly true.

Overall, would I use them again? Absolutely,

https://www.saal-digital.co.uk/

©PeteRowbottom2020

The use of Graduated ND filters in Landscape Photography. by Pete Rowbottom

Graduated ND filters, ND grads, (or GND’s as I’ll call them for the benfit of this blog post), a great subject to stir up a discussion…

gnd1.jpg


They serve one purpose, to darken one area of the image being taken, leaving the rest of the image untouched, 99% of the time this is the sky, as it’s 2-3 stops brighter than the land, they come in different strengths allowing you to darken the area by however much you need to stop it being too bright and becoming ‘blown out’ , giving you an overall balanced image. A brilliant bit of kit, but….

There are those who say they simply aren’t needed anymore with the advent of digital, you can apply GND’s in camera RAW, or you can bracket your images and blend them later on using numerous methods, taking darker exposures as required for the sky to again avoid it becoming blown out, and while I 100% agree that this does work perfectly well, and occasionally I’ll use these options if the need arises, but I’ll tell why I prefer to use them over the digital method. I talked a little about this in Birmingham, at the NEC Photography Show, a lot of people were interested in the angle I was coming from and said they hadn’t thought about it like that before, so I thought I’d write a blog post on it.

There are a few reasons why I choose to use GND’s.

  1. Long Exposure Photography, (hypothetical scene) let’s say you are shooting a long exposure seascape for instance. You get your 10 stop filter on and you shoot the scene without a GND, you calculate an exposure time of 30 seconds and take your shot. In your shot the sky isn’t blown out but it’s at the limit on the right histogram of how far you can go before the sky starts to blow out., but the water in the sea doesn’t look right, it needs longer to smooth it right out. Now from this point you could easily take a few expsoures exposing the sea for longer and blend them later on, the one thing you cannot do is expose the sky for longer than 30 seconds as it will blow out, no matter what you do this IS going to happen. But what if I add a GND in PP later? sure it may recover some of the blown out area but why risk that? also if you ever seen a long exposure image with moving clouds dragging right across the scene you will know how beautiful they can be, and unless the clouds are moving very fast 30 seconds is not going to give you a lot of movement so the image will lack that ‘movement’ feel to it, The solution ? you will need to lengthen the entire exposure, doubling or maybe tripling the expsoure time to get those clouds moving right through the scene. This is only acheivable by by adding a GND, unless you’re happy to just fake it in PS later, which I’m not.

2. Less time in post production - why spend more time on an image than you have to, wrestling with a sky to get it back down to what it could already be in camera can be time consuming and in my opinion can also look poor if not done correctly, get it right in camera.

3. Envisaging your final scene in the field - going back to number 1 a little, you’ve shot your scene with your GND on, you’ve pushed the image as far as it can go you can now preview your shot image, lets say you now have beautful cloud movement, brilliant, you can see the preview of this now balanced exposure and how the clouds will look in each image, by blending images later or shooting images that will need digital expsoure adjustments later on in PP you miss this stage, so you really don’t know if you have come away with a great image until you get home, and if you’re at the other side of the world, or even a few hours drive away when you find out you’ve fluffed your shot when you had the chance, if you care, that’s going to really hurt!

These are obviously only my thoughts on the matter but I wanted to share my views on it since people were interested on my take on it. There’s nothing worse than knowing you ‘could’ have had that image !


Product test: K+F Concept 1-5 stop adjustable ND filter by Pete Rowbottom


k+f 2.jpg
k+f.jpg


I’m a big fan of using filters and find them indispensable for my type of photography, slide in ND filters, ND Grads, Polariser, the list goes on, quite often when I go out I’ll have a bag full of filters and sometimes even 2 systems to cover a super wide lens.

However one thing I have never used (until now) is an adjustable screw in filter, they don’t tend to get very good press and for someone like me who uses a dedicated slide in filter system they really aren’t going to be much use, or so I thought….

K+F Concept asked me if I would be interested in trying out their new 1-5 stop adjustable screw in filter to see what I thought of it, I must point out that I’m not affiliated to or employed by K+F in any way, and as such agreed to give an honest an unbiased view.

The first thing that strikes you about this product when it arrives it that is really does seem to be good quality, well packed in a stylish box, and it comes with a great sealed and padded hard protective case that will take some abuse outdoors, the filter itself seems very well made and the rotating movement of the outer element is extremely smooth and easy to use.

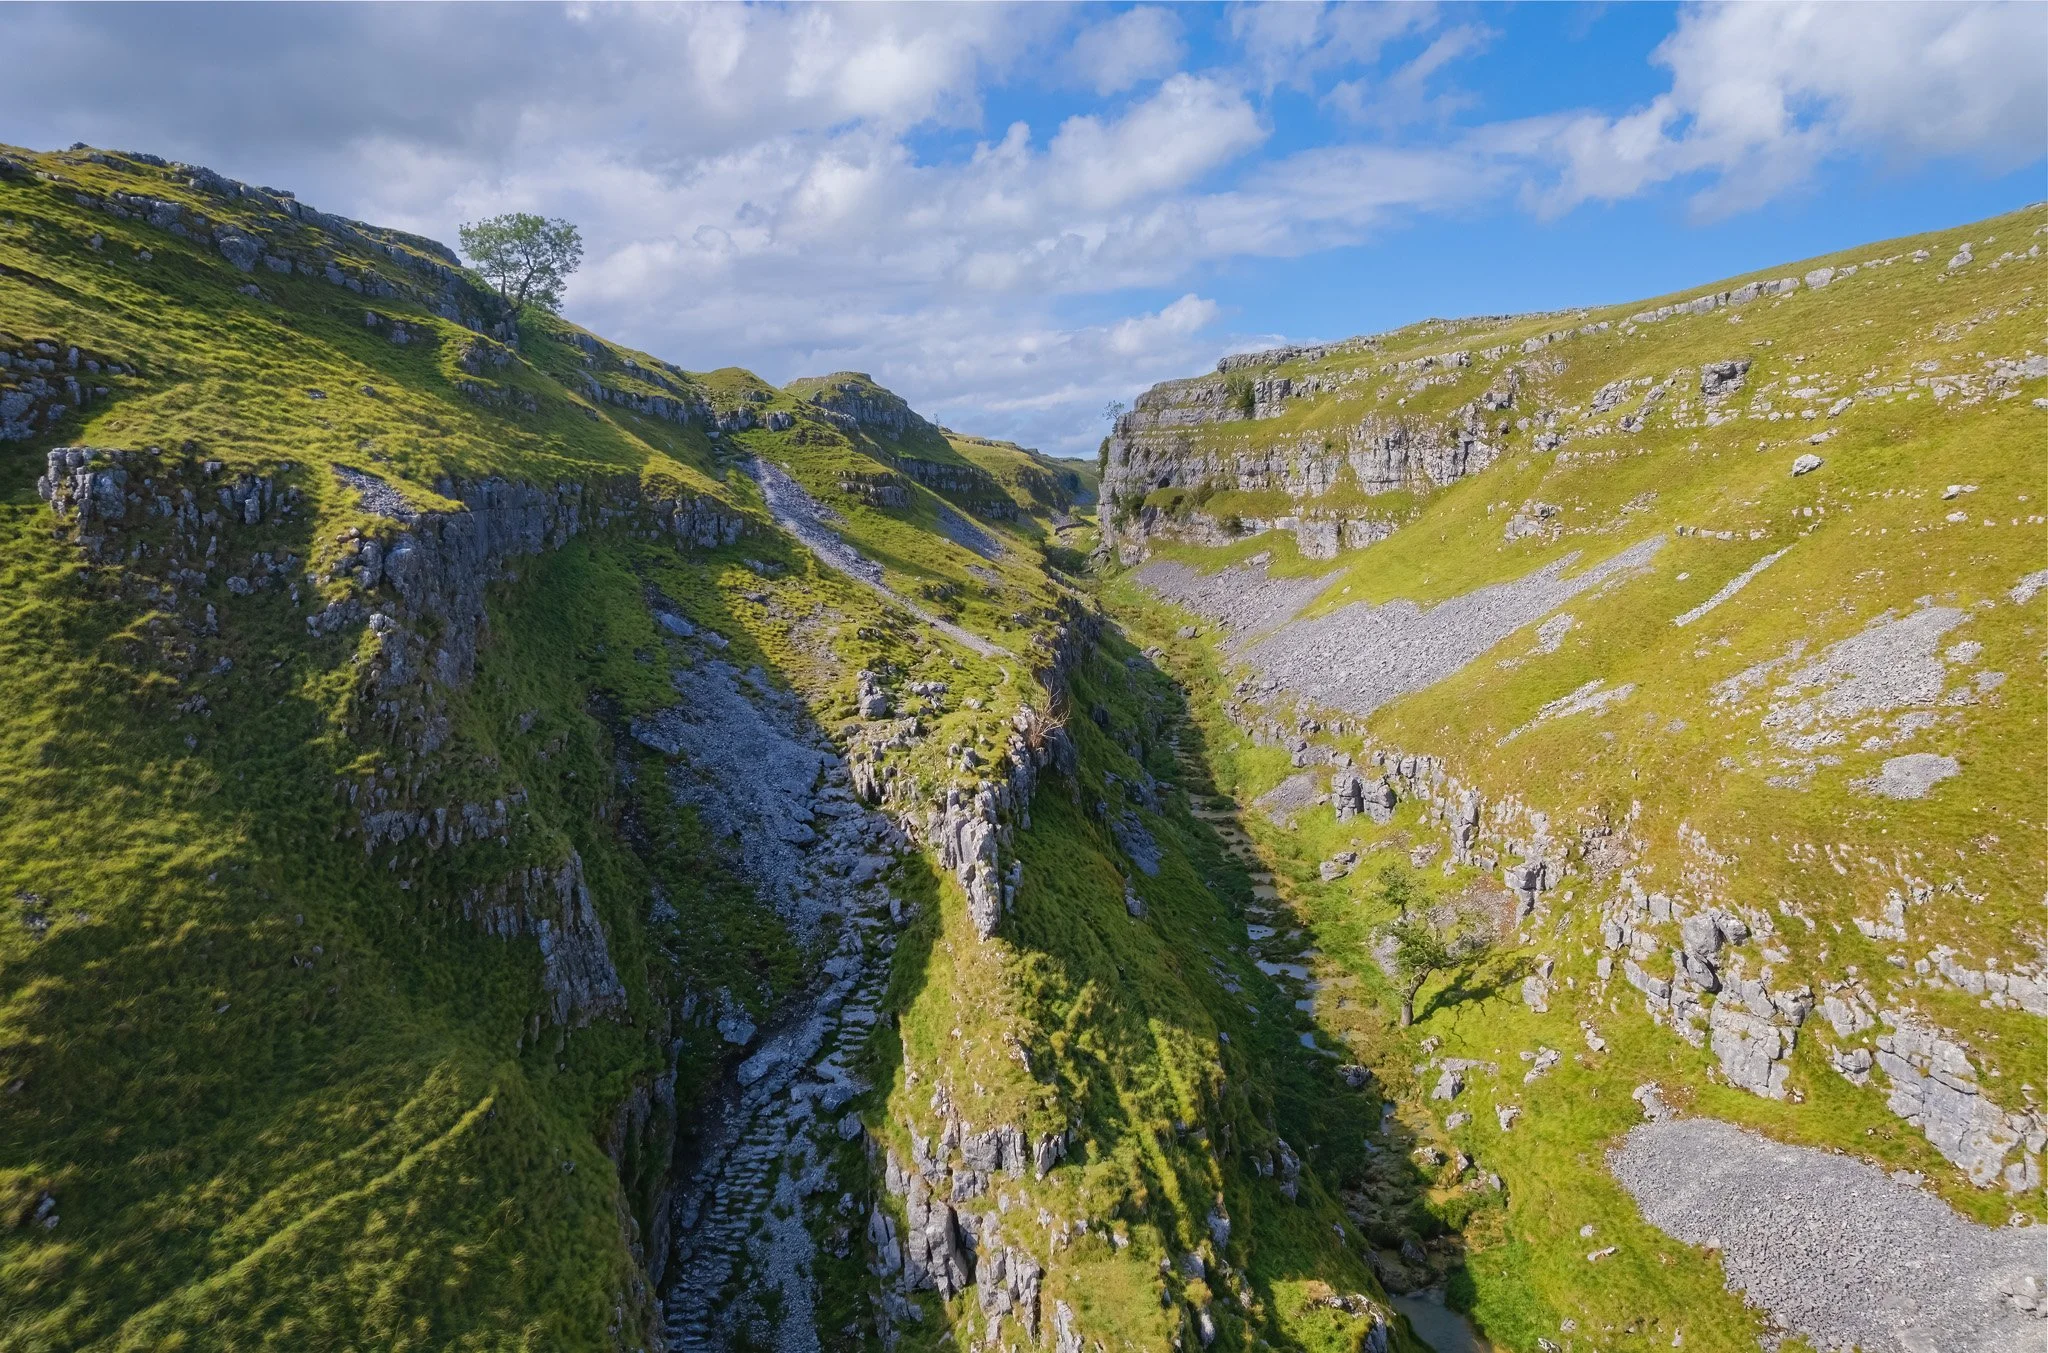
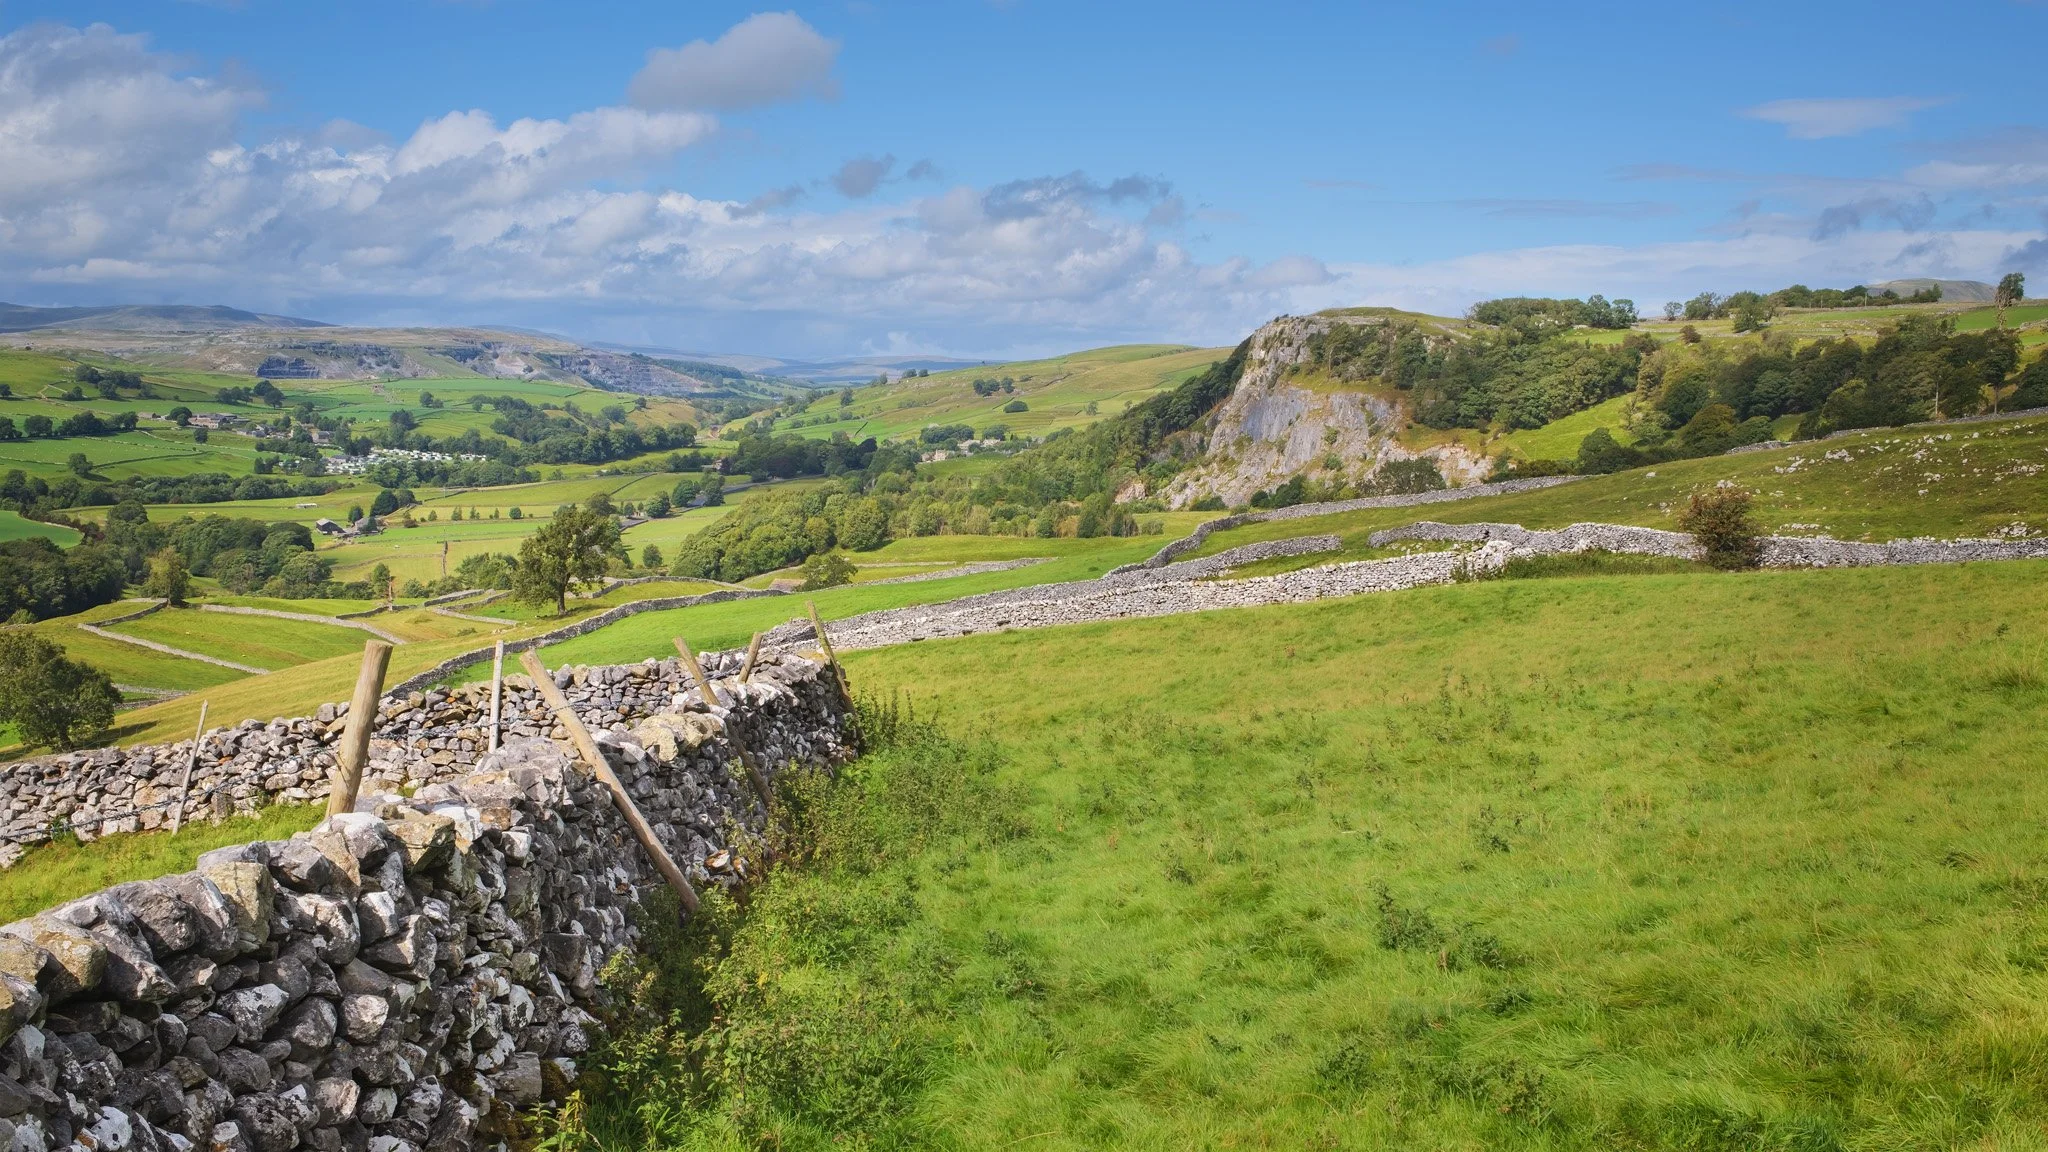
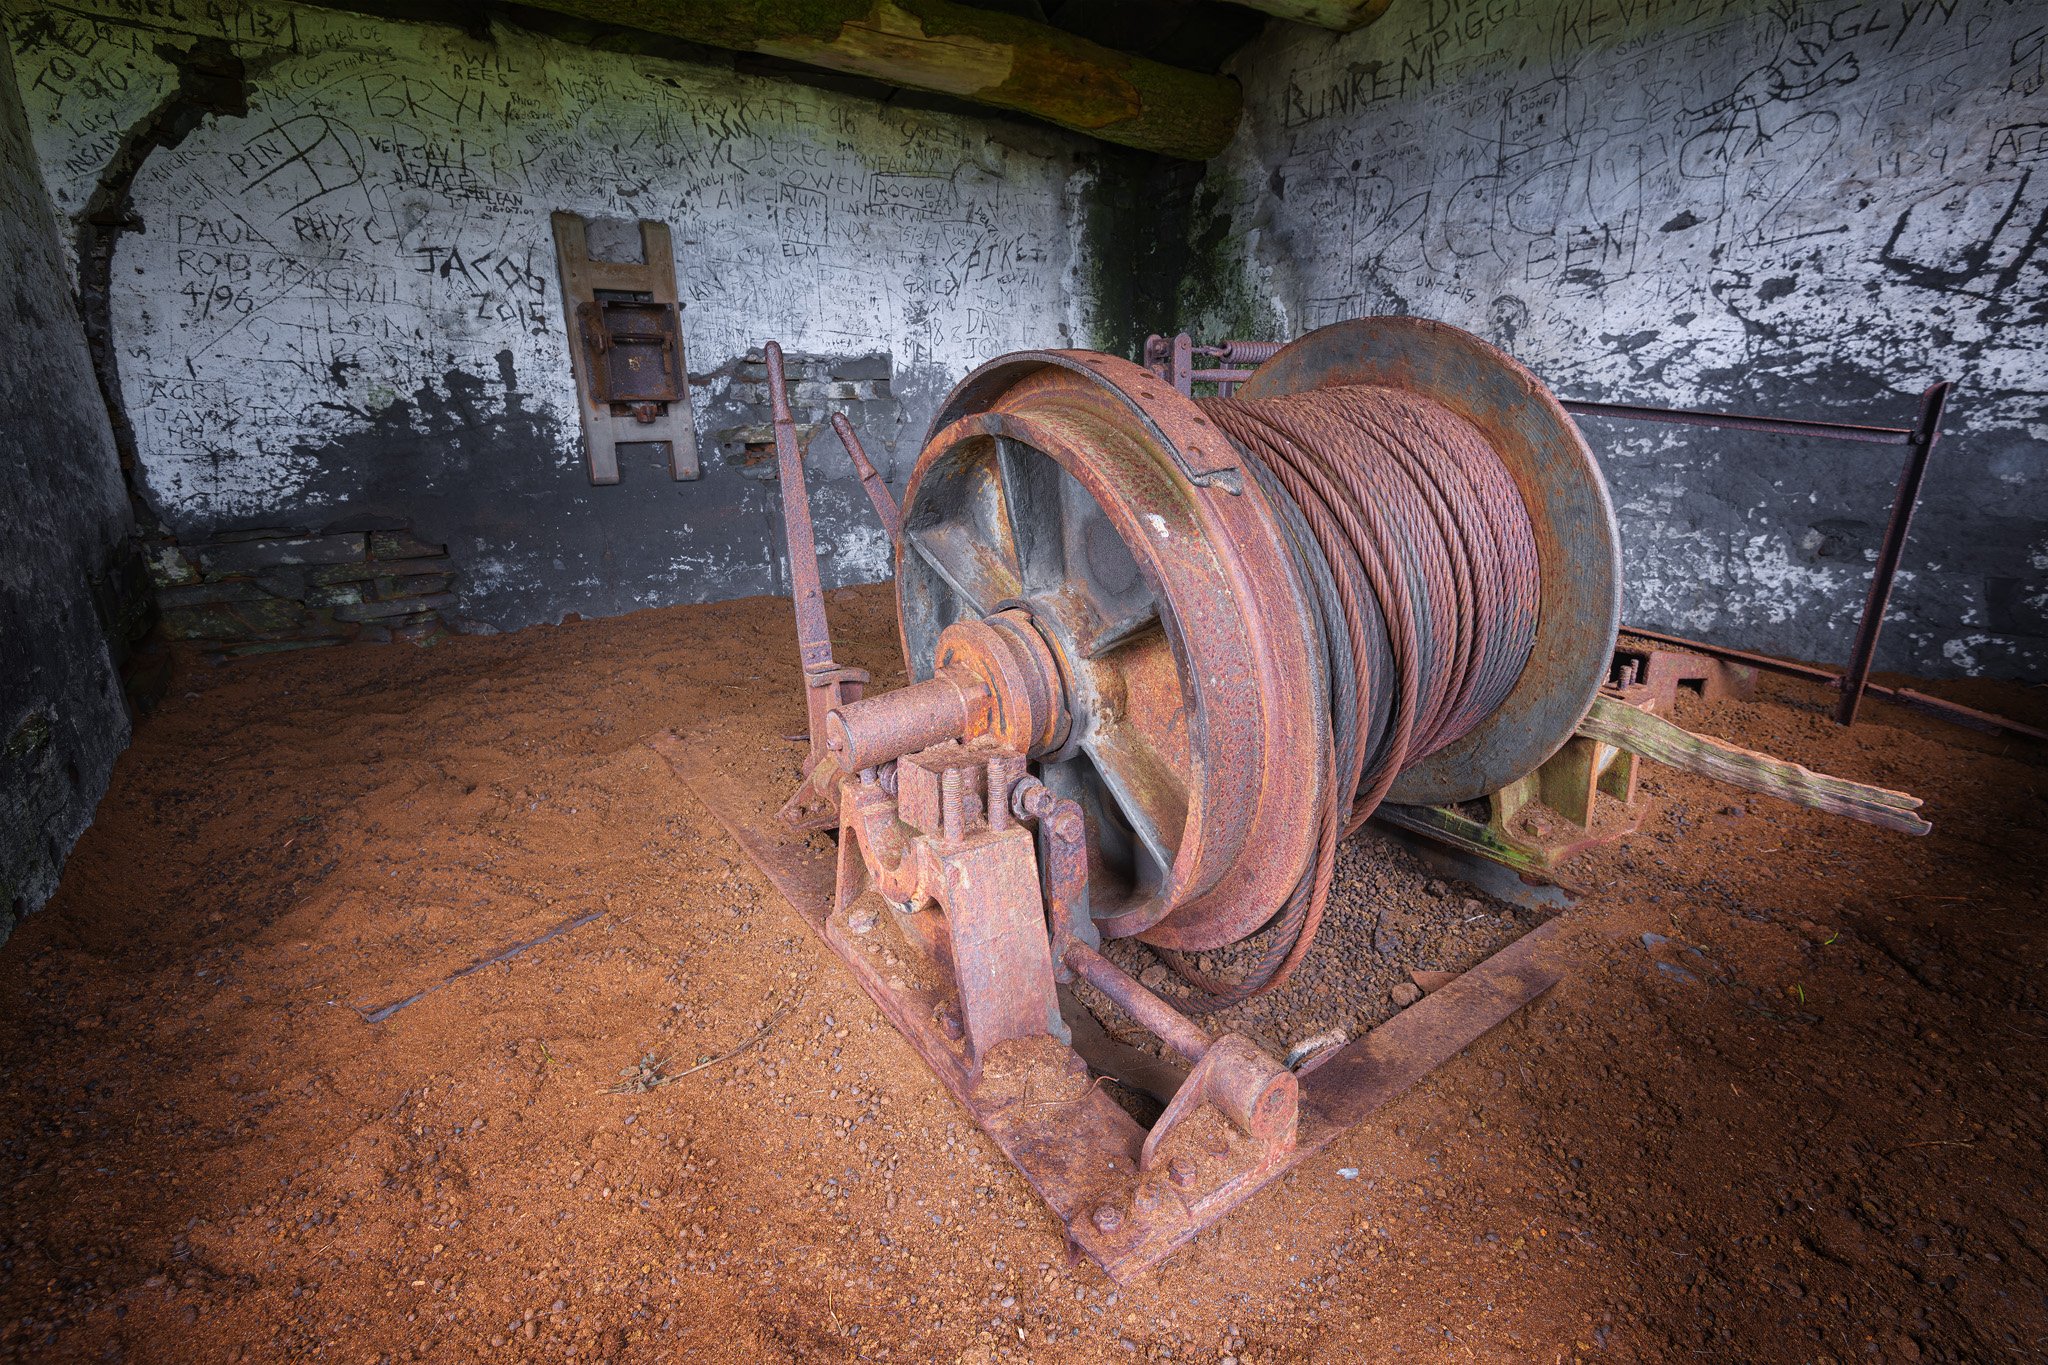
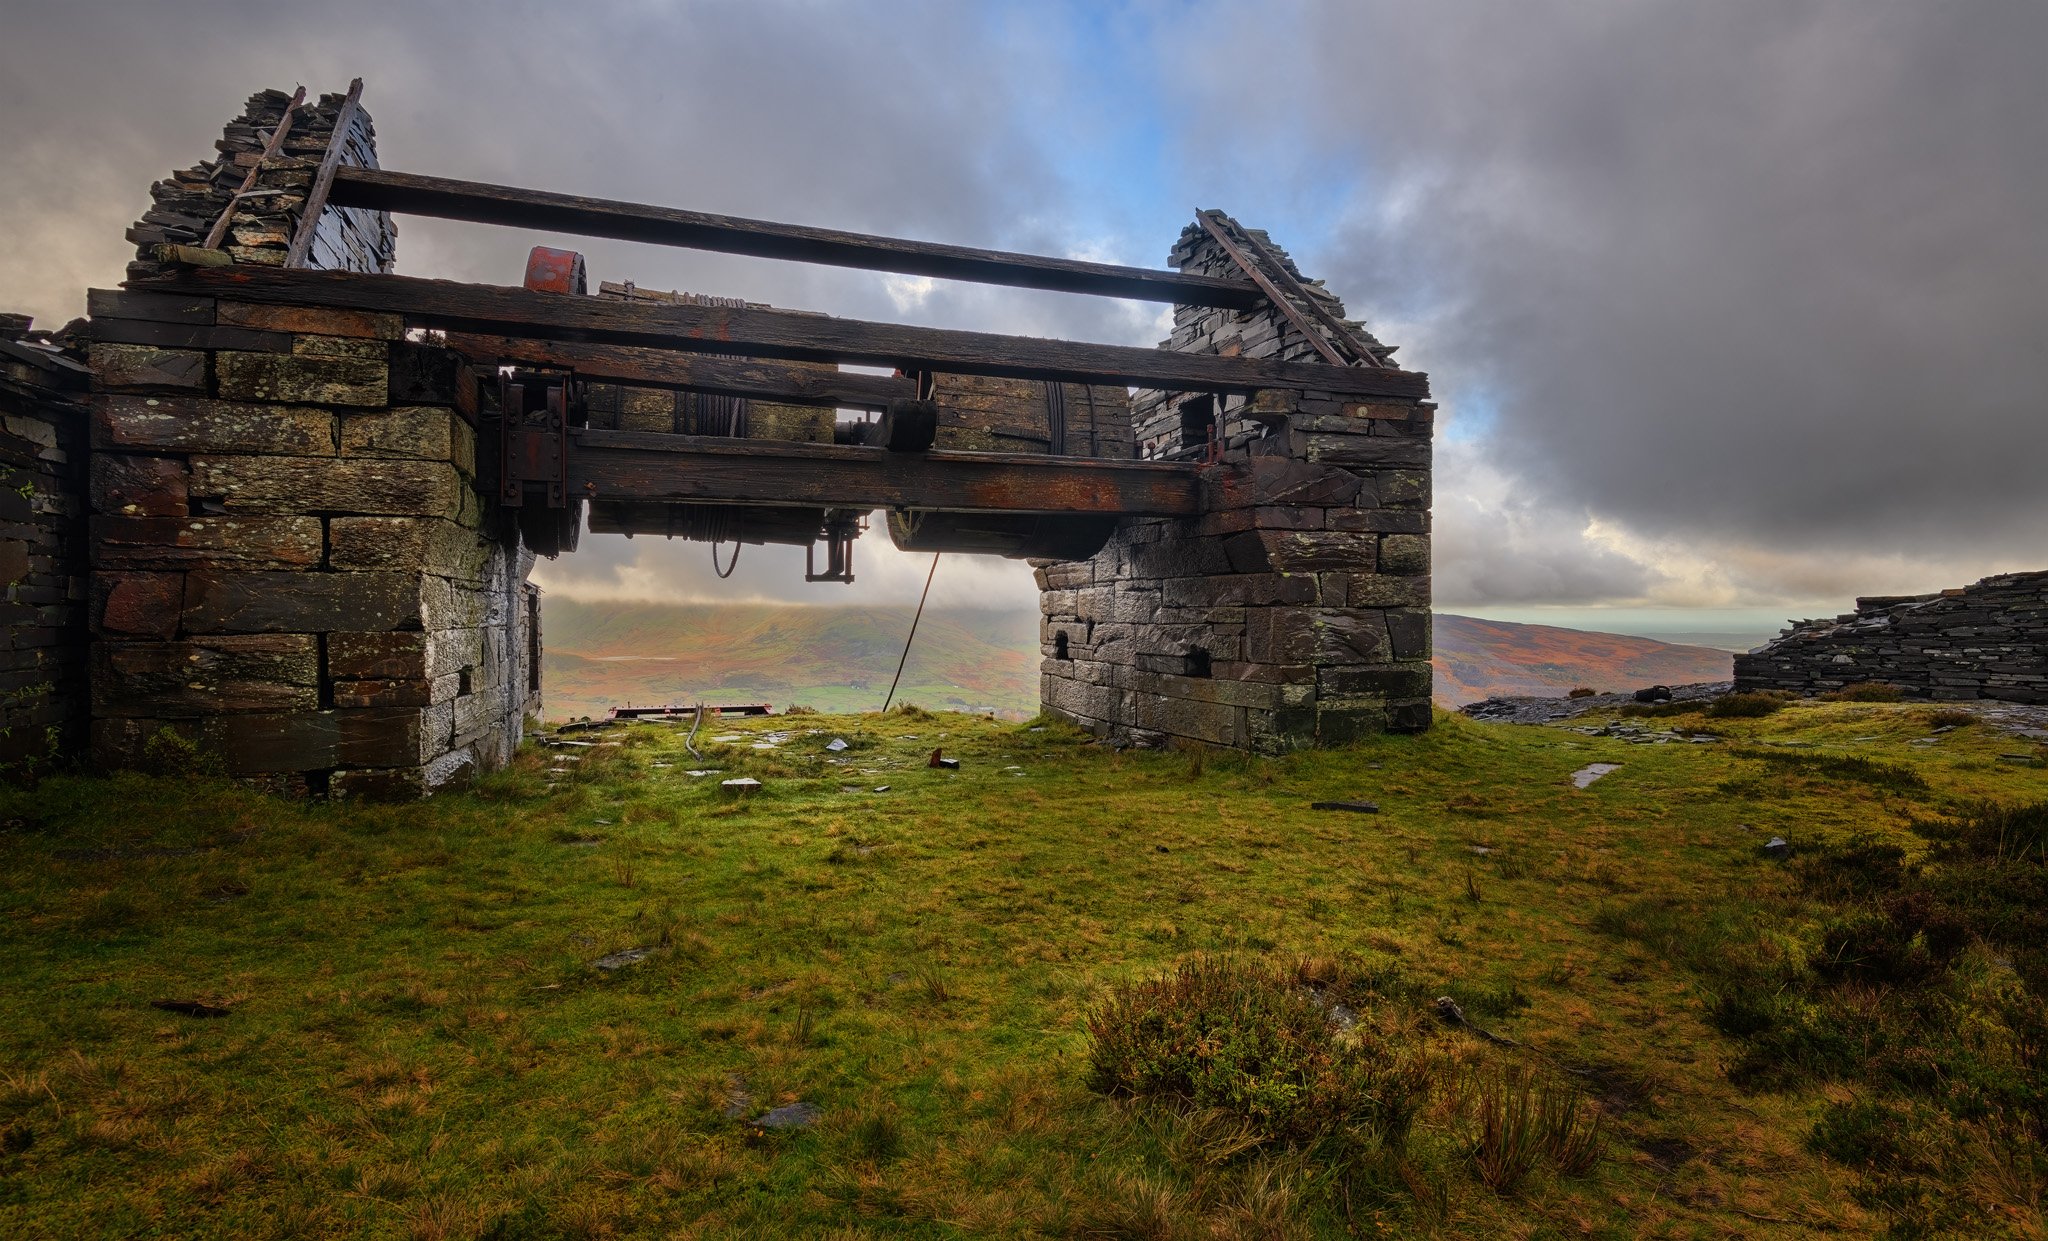
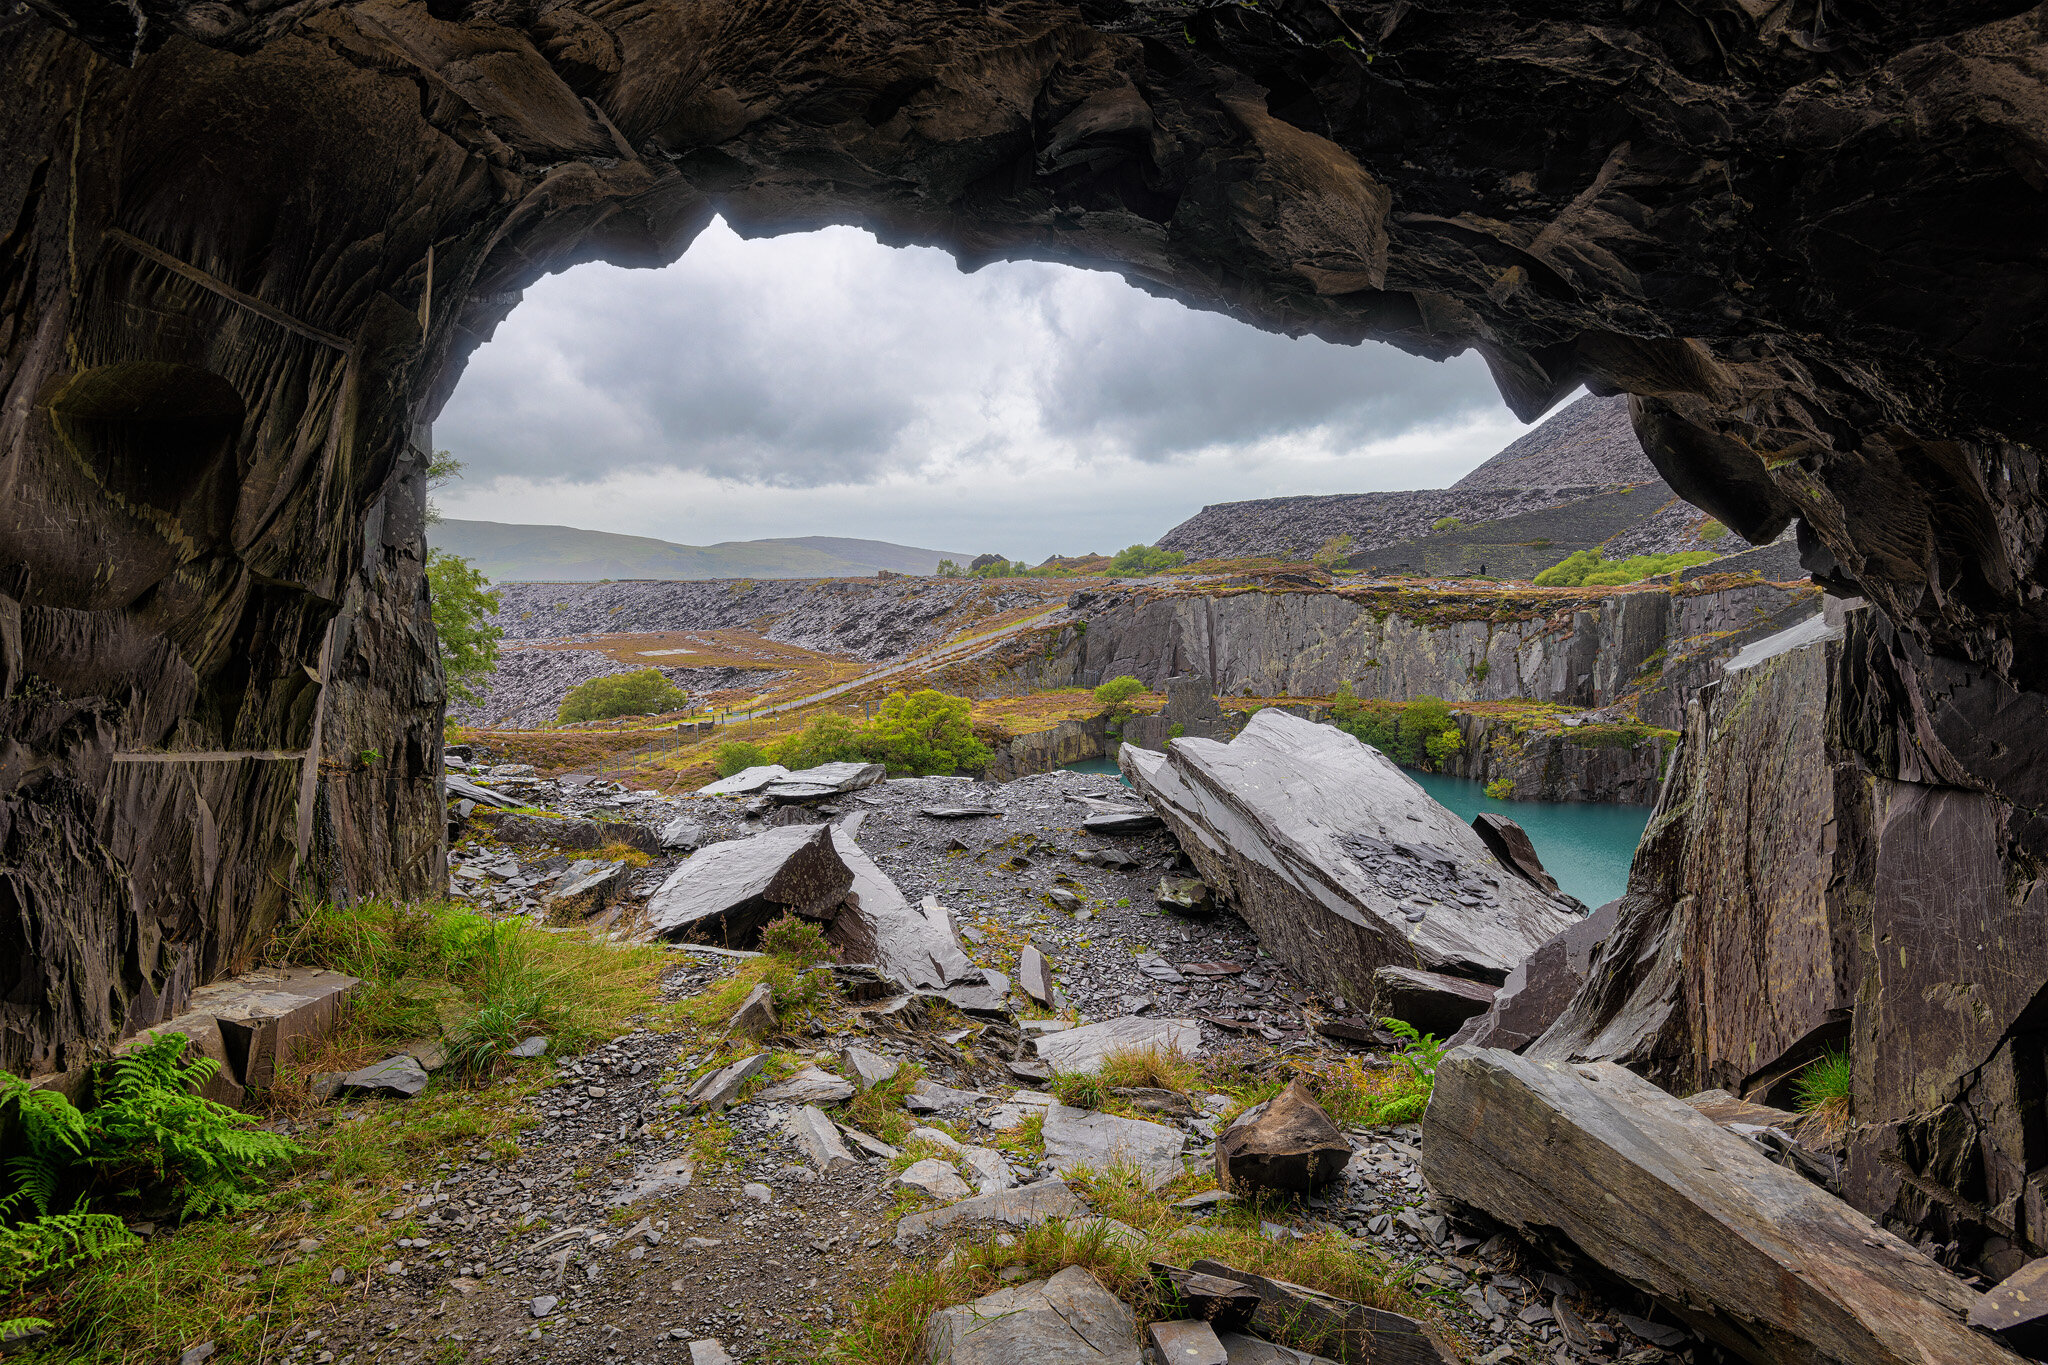
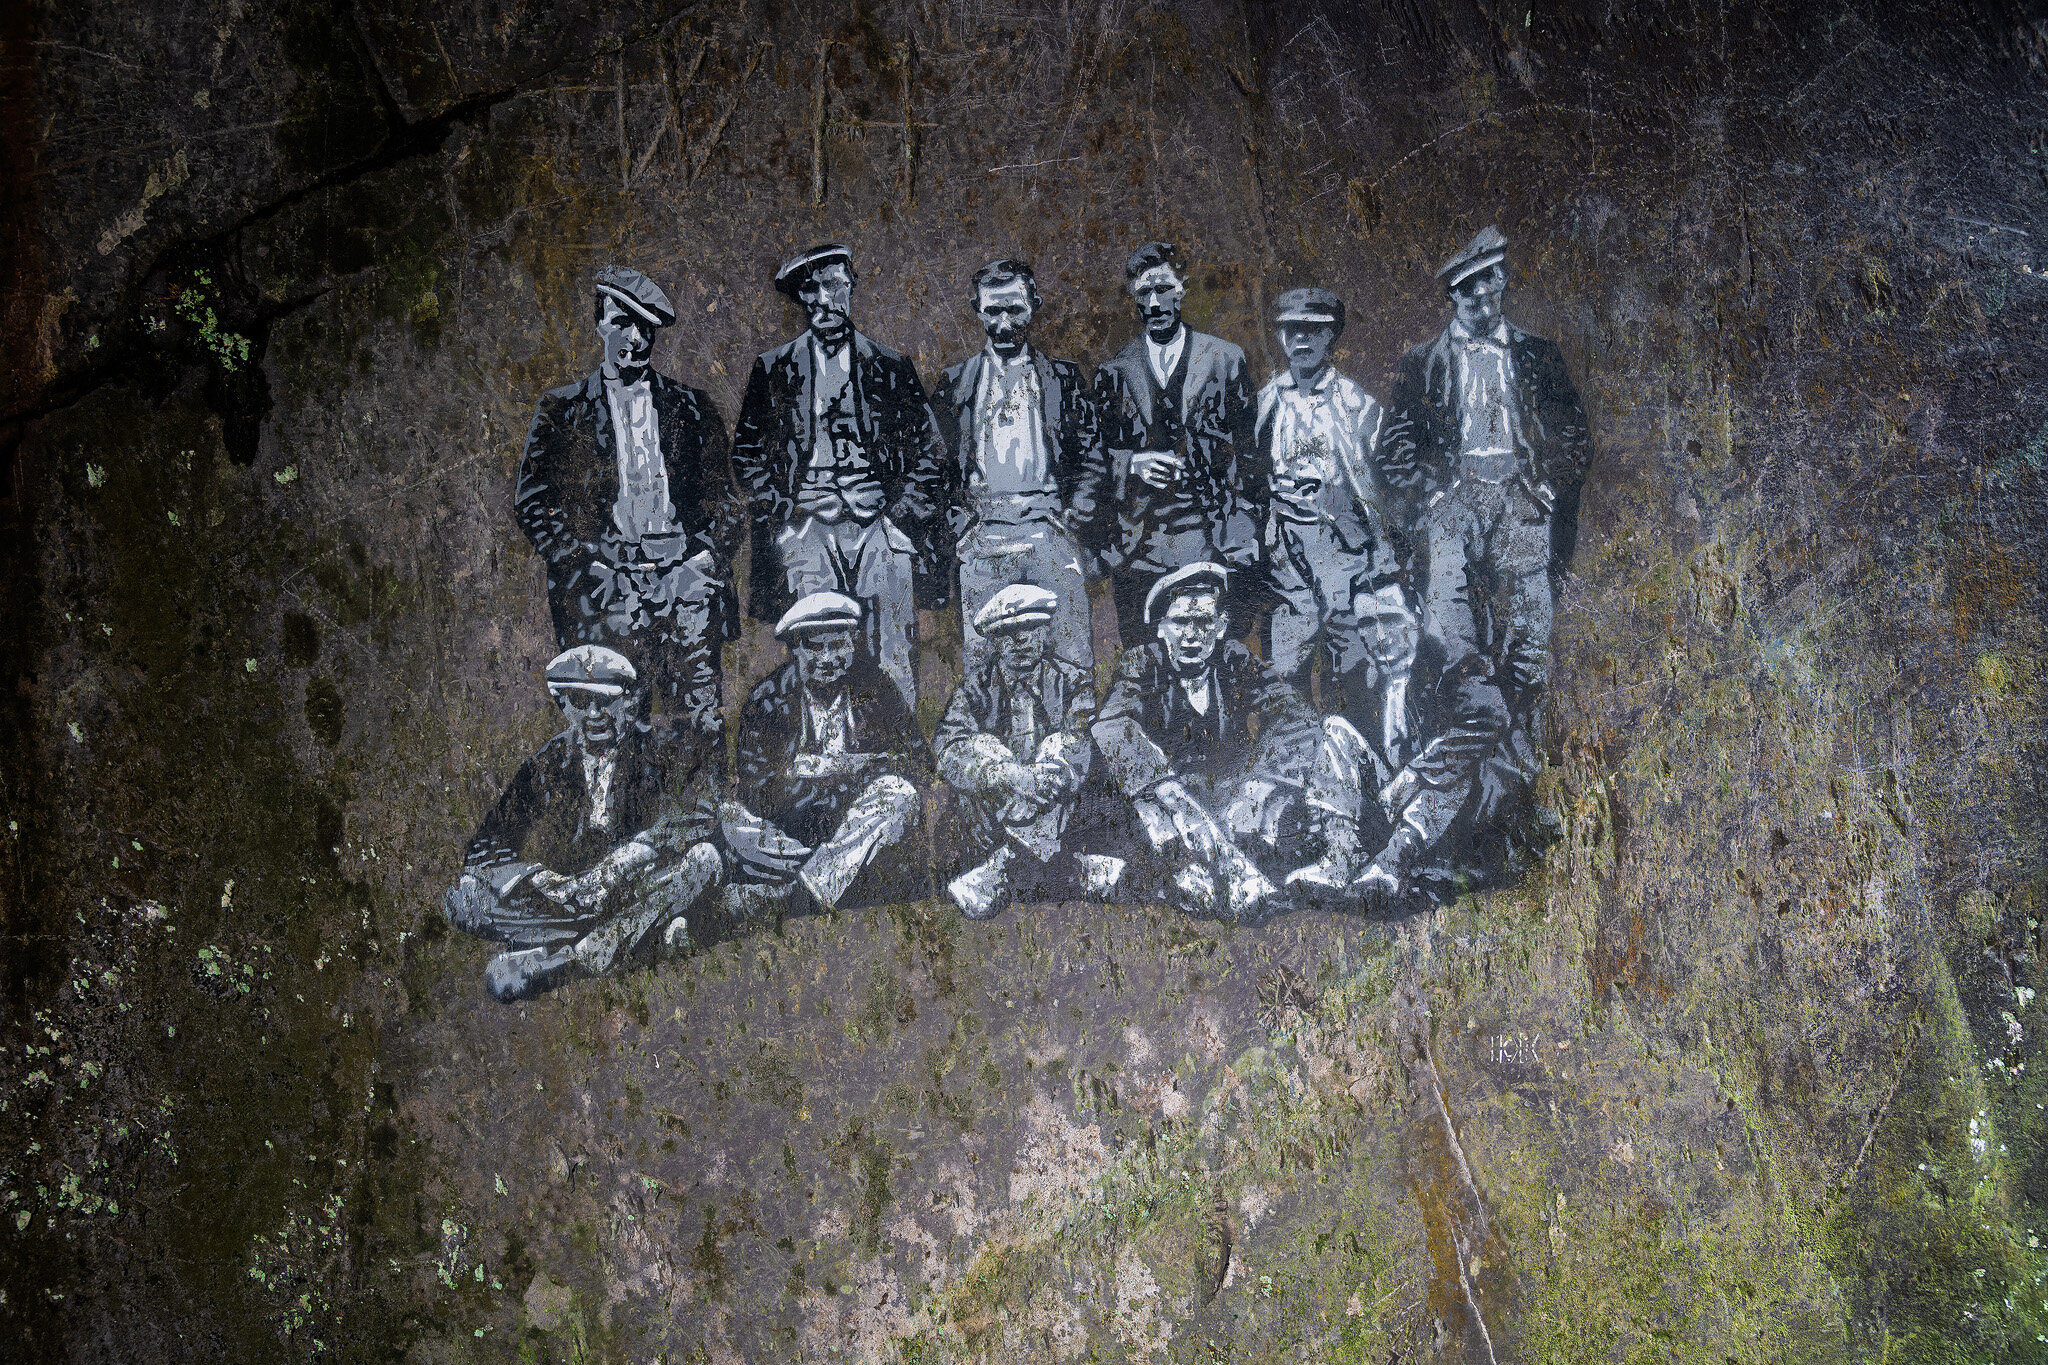
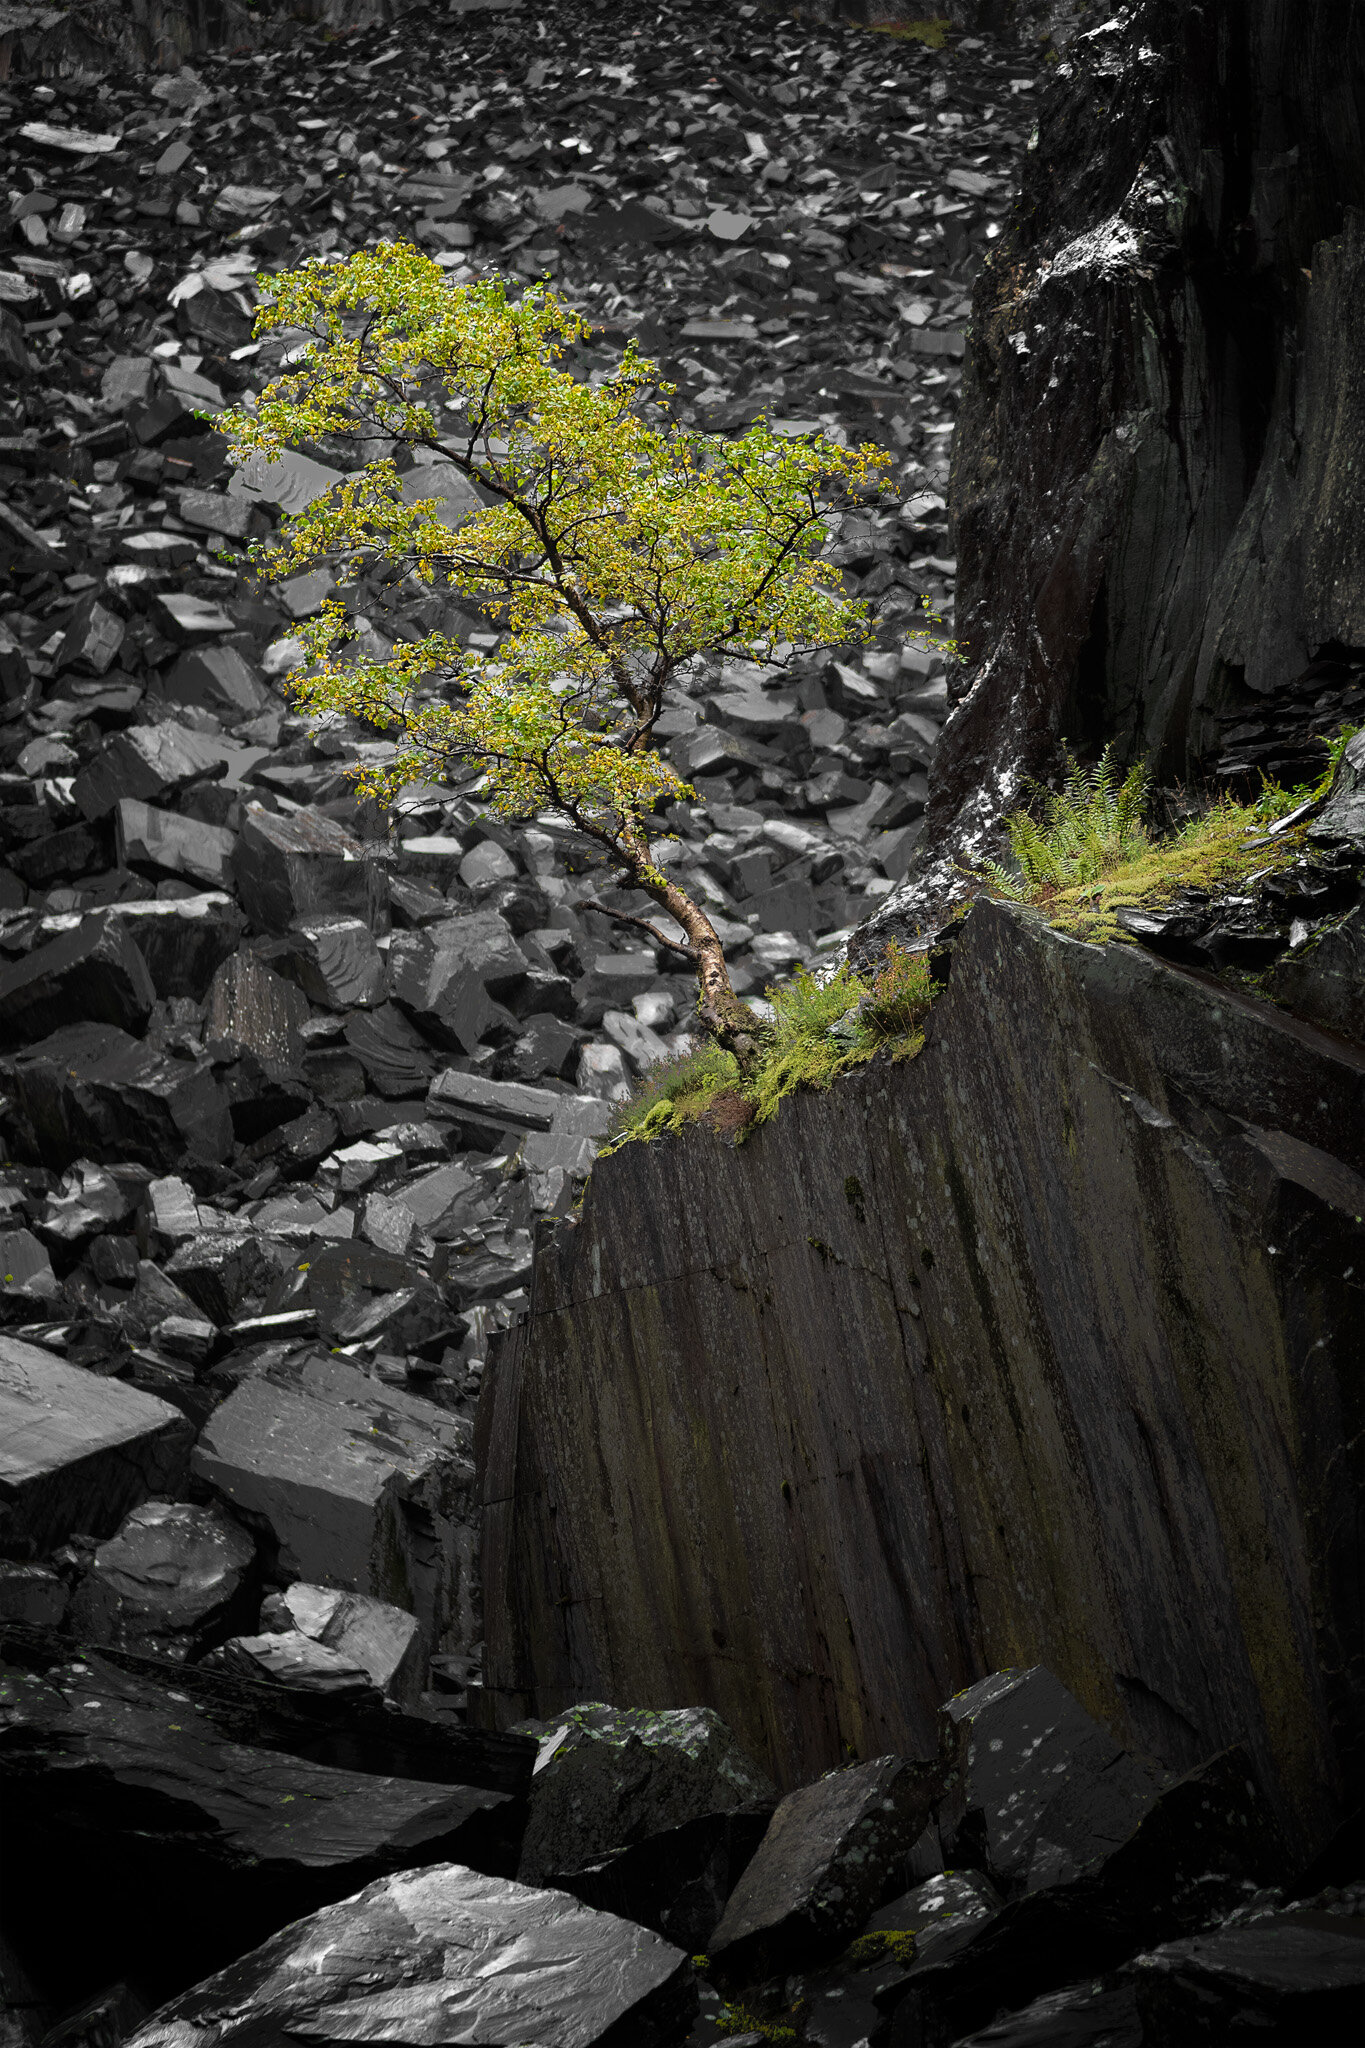
As with anything the proof is in the testing and I took it out on 2 recent trips with me to North Wales, and The Lake District.

————————————————————————————————————————————————

Actual Usage

A big issue with variable filters can be a dark ‘X’ mark evident in images where the the polarised light is at opposite ends of the filter, K+F say that is not the case with this filter and indeed it is a direct selling point on the website. In the images I took I found this to be the case, no signs whatsoever of any X (or other mark) from minimum filtration right through to maximum.

The other issues normally you could expect with many screw in filters is vignetting (darkening of the edges of the frame) on wide angle lenses, this is a very slim filter but even so I wanted to see how it performed on the Nikon 16-35mm lens on a full frame camera, 16mm on full frame is really the widest you will be able to go without requiring specialist equipment to mount any kind of filters to your lens, again the filter performed admirably with no vignetting at all - very useful and another box ticked.

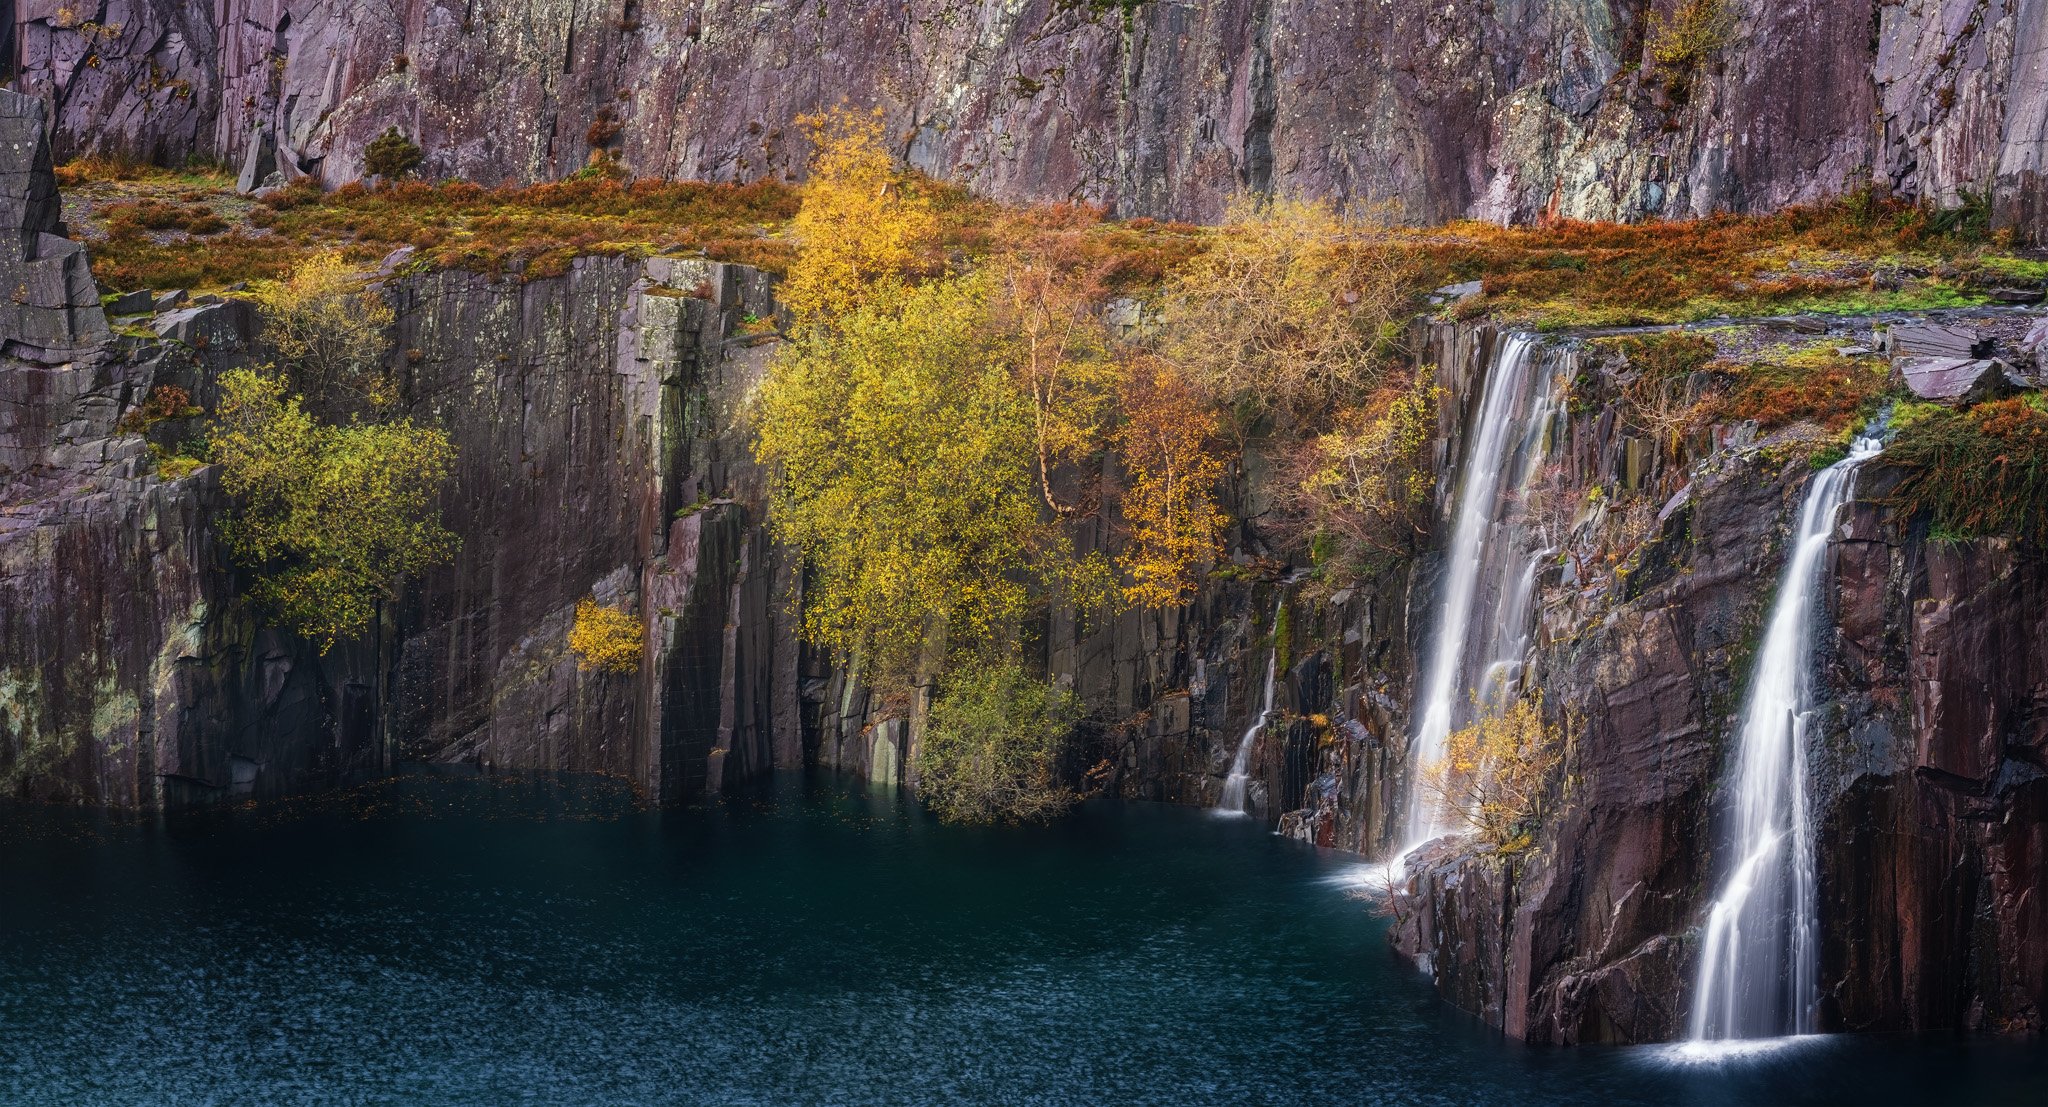
Although they have many uses, as a mainly outdoor photographer, for me, ND filters in the range of 1 to 5 stops have 1 main use, water movement. This is where this filter comes into it’s own and I found it great to use, ideally with moving water where I want to show movement (but retain detail in the water) I will be looking for an exposure time of around 0.8 - 2 seconds, any longer and I would be looking for a 6-10 stop filter. The beauty of this filter is that you can easily compose your shot with the filter in place, focus with the filter in place, then simply turn it until you get your desired shutter speed, should you need to change your shutter speed for different effects in the water there’s no need to mess around removing filters and trying other ones - it’s simply a small turn of the filter. In fact it’s so easy there’s no reason not to take shots using different speeds to select later or even to combine for different areas of the final image where water flow may differ in the scene. With 1-5 stops you are not going to see much cloud movement in the sky at most times of day, which is why I say this filter is best suited for moving water images.

Colour - sometimes with ND filters you will get a colour cast to the images, I didn’t have a problem with this one at all, if anything there was maybe a slight warmth but if you are shooting in RAW it isn’t a problem anyway and so easy to correct, however I didn’t feel the need do any correction.

Conclusion and thoughts

I think this is a great little bit of kit, and I say little as that’s exactly where it’s strength is, even in the filter case it’s so easy to just slip into your jacket pocket, I often shoot in the middle of rivers or streams and going back and forward to the riverbank if you need to change filters can be troublesome, as can applying or changing over filters in the water, not to mention the chances of dropping and breaking them on rocky areas. With this one I can simply apply it to the camera before I take it out of the bag and that’s that done..

Another occasion in the Lakes I had a very small amount of time to capture an image I had spotted, the set up with this filter was so quick it allowed me to get the shot, something I wouldn’t have had time to do with a full filter system setup. A fellow photographer who was in the Lakes with me also had a variable ND with him which he uses on his vlogging video camera, we compared the 2 filters side by side and it was clear that this one was far better.

There will be times where this filter isn’t suitable for images I’m taking, for instance where I want to combine or ‘stack’ filters like a polariser and ND grads as this will start to introduce vignetting, but that’s not a problem as I don’t see it as a replacement for my other filters, but I do see it as a great solution where I need a travel filter, where I’m walking long distances and need to travel very light, and as mentioned before where I have very limited time and need a super quick setup, I honestly can’t fault it, and for the price ( around £50) it will be a great addition to anyone’s camera bag (or indeed pocket), no matter if you are a beginner or a seasoned photographer. Would I buy one ? - Yes, anything that meets my needs and adds to my flexibility, while also saving me weight on longer trips is a no bainer.


A link to the filter on the website can be found below, it comes in various filter sizes, if you are buying one, my tip would be to buy the one with the diameter of your biggest lens, you can always buy step down rings for other lenses but you can’t use a smaller filter on bigger diameter lenses.

https://www.kentfaith.com/82mm-filters/KF01.1064_82mm-nd2-nd32-variable-nd-filter-18-layer-multi-coated-glass

I’ve included a few images I’ve shot using this filter, images taken using the Nikon D810 & Nikon 16-35mm F/4 lens.

1.6 seconds

1.6 seconds


3 seconds

3 seconds


1/5 second

1/5 second


Abandoned 1984 Winter Olympics Bobsleigh track, Sarajevo, Bosnia by Pete Rowbottom


In 2015 myself and a mate of mine traveled to Slovenia to watch England play Slovenia in an international football match (well he did, I was there for the travel mainly), to make things more interesting we flew to Split in Croatia, and from there made our way into Bosnia, before heading from there to Zagreb and across to Ljubljana. Part of the trip was one place I was really looking forward to visiting, Sarajevo. A city that has seen so much bloodshed, destruction, and unbelievable atrocity as recently as 1996, when the siege finally ended.

Sarajevo is a great city, steeped in history and a real mix of cultures, making for a great visit. While we were there we learned that the sites of the 1984 Winter Olympics were still in place and had been left abandoned on Trebević mountain overlooking the city, this for me was something that really flicked my switch and simply had to go and see before we left, so the next day we set off to try and get there.

Numerous taxi’s point blank refused to take us there, we didn’t know why… eventually we found one guy who agreed and we set off, half way up into the mountains he stopped and removed the ‘taxi’ sign off the roof, saying “no taxis here” or words to that effect, he eventually dropped us off in a small empty car park, overlooked by what appeared to be a completely burnt out hotel complex, we paid him, and before he made his rather swift exit, he pointed us toward a small road heading into the forest.

The weather was great, we were high up in the mountains in the middle of nowhere, and there wasn’t another soul around, as we walked down the track signs started to appear on trees, we couldn’t read any of them, they appeared to be warnings and we just presumed they were to do with forest fires… shortly afterwards we saw the Olympic rings painted onto the road and looking up we could see the first curve of the abandoned bobsleigh track above us.

First sight of the track

First sight of the track

Climbing up onto it wasn’t hard and were soon exploring away, we walked to the very top where the old viewing stands were still in place, albeit covered in moss and trees, from there we made our way down the 30 year old concrete track, along the way there were strange ‘holes’ in the high walls of the track, obviously man made but for what purpose we didn’t know, (we would find out a day later)

Overgrown track walls

Overgrown track walls

At this point I must stress that we really had not researched this outing and it was a pretty much spur of the moment decision to do the night before, looking back it was incredibly stupid given what had happened here.. as we neared the bottom of the track we realised that we were still really high into the mountains, the city just a distant feature a good way away, we somehow thought the track would just lead us right back to the city… at the bottom of the track there was the finish line bridge with all the old lettering on it, we took turns at climbing up onto it, again amazed that there was nobody around… amazed that was until we walked just a little further on to the physical end to the track, where we found a concrete pill box and absolutely loads of yellow tape everywhere with the wording ‘POZOR / MINES’, yes, we were in the middle of an uncleared minefield, the Serbs had land mined the area before they left .


Mine warnings

Mine warnings

As you can imagine this revelation put a different stint on the visit, we were still miles out of the City and no concrete track to take us to our destination, instead there was just an old vehicle track heading downwards with bombed out houses either side, all riddled with bullet holes.. as far as I could see it there were 2 options, walk back up the track and somehow try to call another taxi (if there was signal and we could somehow find a number) or we just cracked on and walked down the vehicle track, walking in where vehicles had been and not in the grassy central area. We chose the latter option as there was certainly no guarantee anyone would come for us given the reluctance of most drivers to actually take us up there in the first place. As we made our way down I was taking pictures of the buildings in a real war torn state, there were some great images to be had but there was no way we could even consider leaving the track we were on so everything had to be shot from a distance, my mate seemed quite amazed I wanted to still take photographs, my reasoning being that if we got blown up it wouldn’t matter anyway, and if we got out OK then I would have the images.

To cut a long story a little shorter after an hour or more we eventually came into a better stretch of road and shortly afterwards some inhabited houses which was a great relief, a guy washing his carpets in the street spoke to us and after realising we were English was really friendly and offered us a drink, we thanked him but we just wanted to get out of there and pressed onward to the city.

Heading back down to the City

Heading back down to the City

Eating our lunch of Kofta kebabs in the city a while later was a great moment and a time to reflect on something that could easily have gone a different way, I think we both learned a lot that day. We later found out that the holes in the walls of the track were made by snipers, used to pick off unsuspecting members of the public, trapped by the siege, just horrific.

Locals look on at the war torn buildings

Locals look on at the war torn buildings


Travelling light, all images from this trip were shot handheld on the mirror-less Fuji X100S with wide angle adaptor, and LEE 100 x 150 mm filters.

A set of images from the trip can be seen in the gallery on the right hand side of the blog page.